When the car first arrived the trunk lid appeared to be in pretty good shape. The paint was severely weather checked, but there didn't appear to be any major dents or rust areas. But after seeing rust on every other panel so far, I have learned to be skeptical.

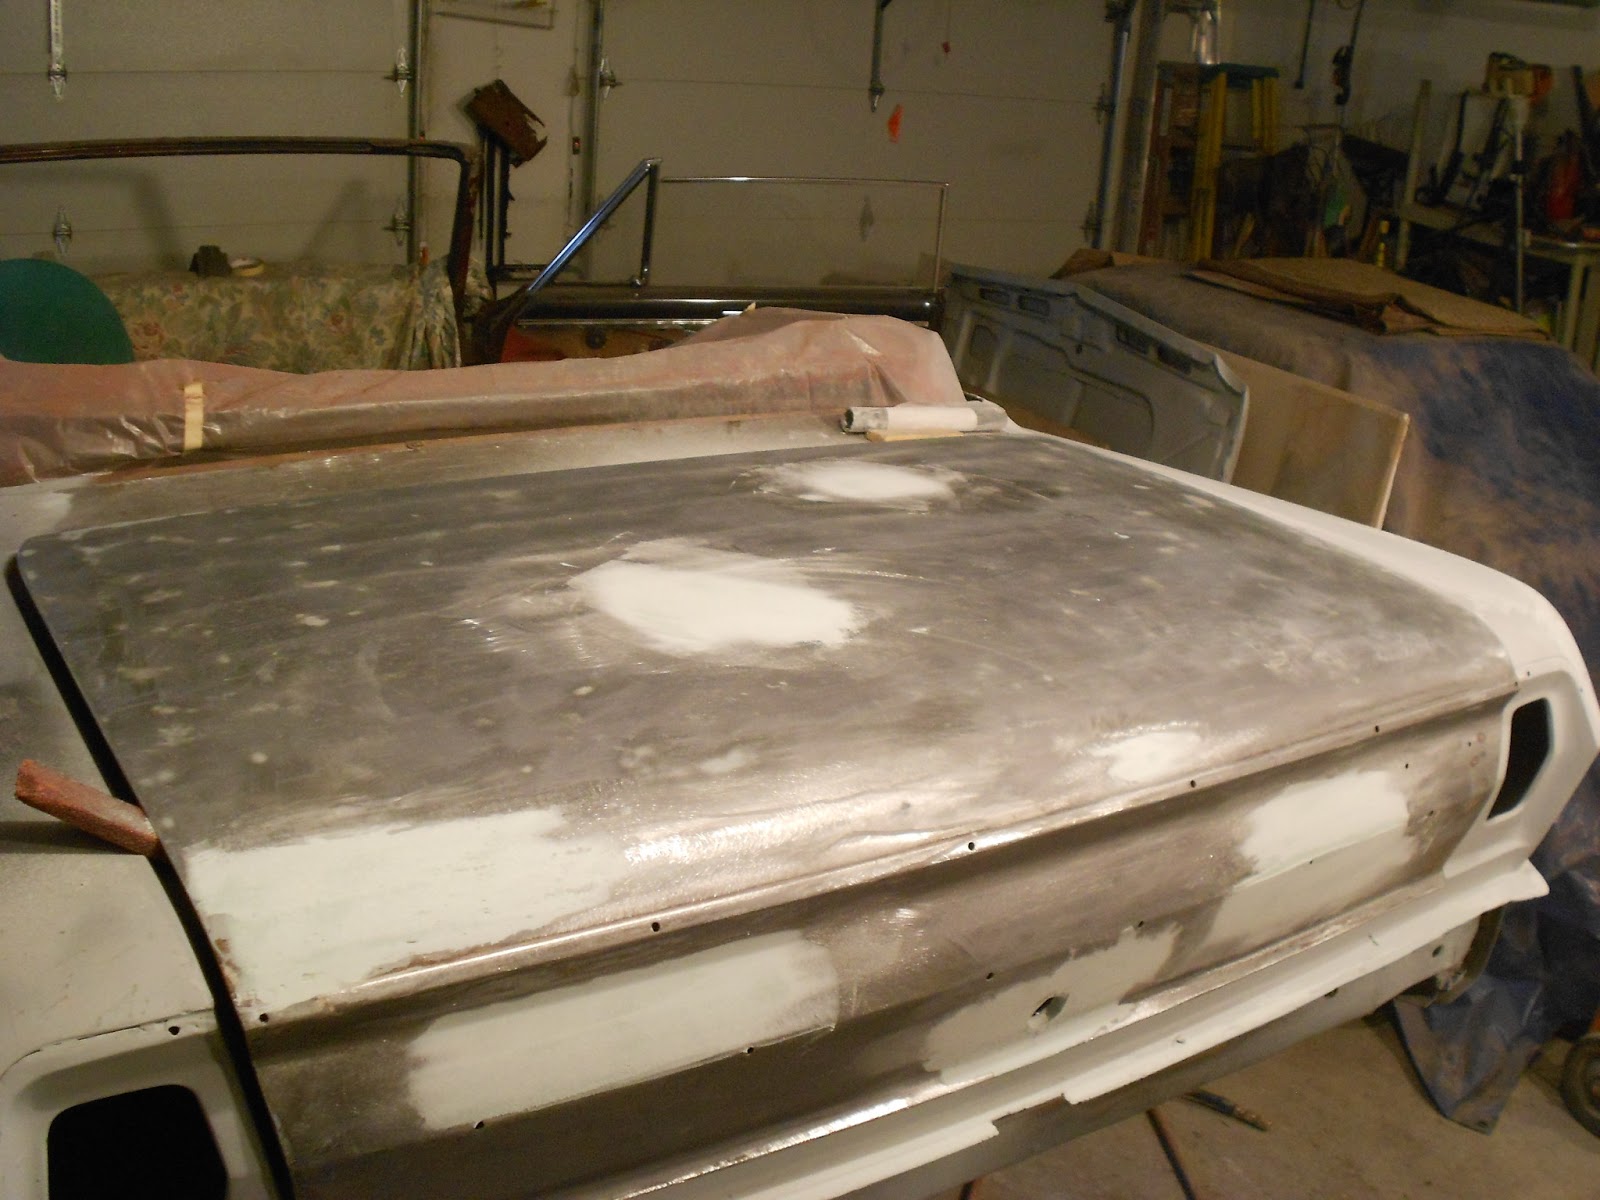
Here it is with all the paint sanded off. Rather than use chemical stripper to remove the paint, I put some 36 grit paper on my dual action sander. It took about the same amount of time, but was much cheaper and didn't make as much mess. The paint comes off like dust and is easily vacuumed up with the shop vac. In this view you can see there are several places where dents have been filled with filler.


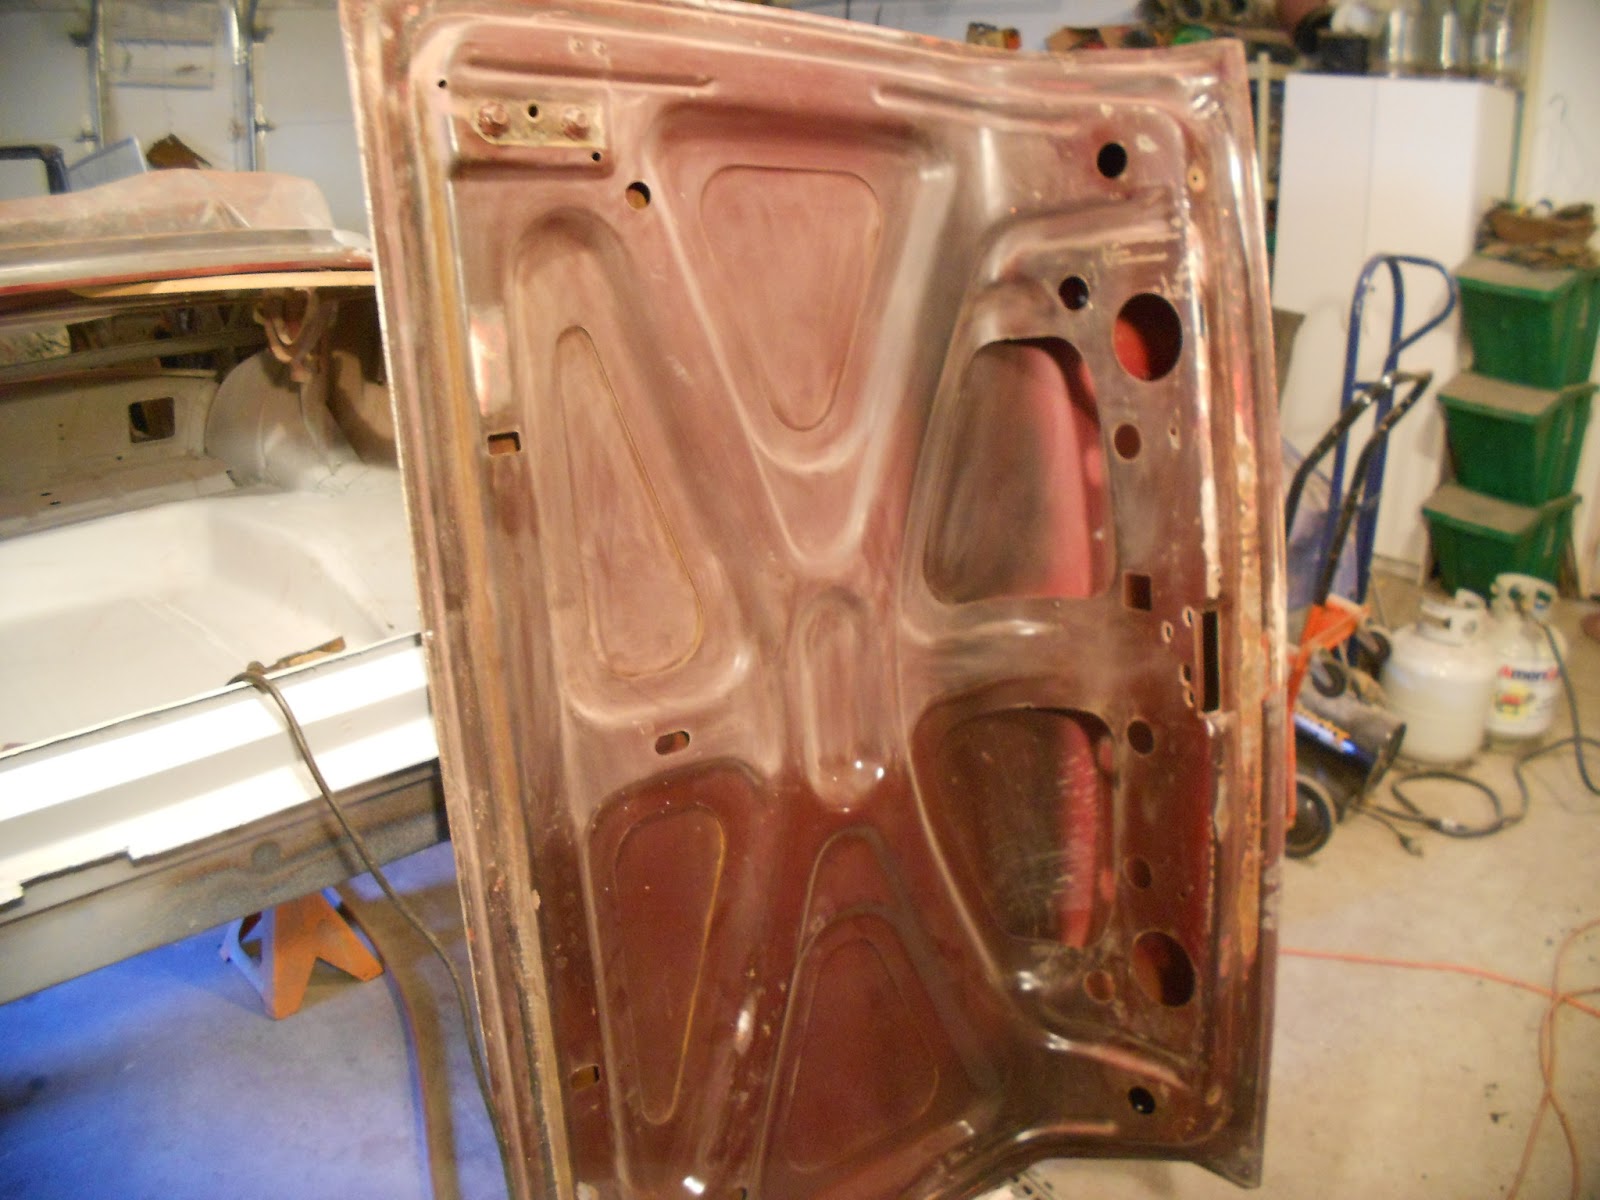
The area around the lock cylinder appeared to have been dented in and just filled with Bondo. This was my main concern as I sanded the paint away.

In this view you can easily see a couple of spots on the rear face of the deck lid. But there is also an area on the near corner that doesn't show up well in the pictures.

The area just in front of the trunk lid is called the upper rear body panel. It is what ties the two quarter panels together. Since the old paint was weather checked just like the trunk lid, I sanded all the paint off of it too. There were several areas of rust, which will need treating with the phosphoric acid. But they were just light surface rust.

Here is the area around the lock cylinder after all the Bondo was removed. If you look closely, you can see that the entire recessed area has been pushed in. The part at the 4 O'clock position is really dented in, and the hole the cylinder goes through is out of shape.

In this shot I have drilled holes and will insert the hook-like tool into them to pull the metal out.

This view is after the metal has been pulled out and the holes welded up.
I love that MIG welder. If you tried to do this with acetylene welding, you would warp the metal.

Here it is after the welds have been ground down and a couple coats of Bondo added. I had to add metal to the right edge of the hole and grind it smooth many times in order to get the lock cylinder where it would fit without moving around in the hole. It took a LOT of work to get it to this point.
The black paint around the hole is what I used to show the roundness of the hole better. After spraying a thin coat of paint I sanded the inner lip of the hole to check for roundness.
There were several other dents and dings that needed filling, but they were nothing compared to the work that went into the area around the lock. While I was waiting for Bondo to harden, I was blocking out the primer on the right quarter panel to get rid of scratches. The frame of the convertible top has been covered with plastic so no dust or overspray gets on it.
After the dents had been repaired and primed on the top side, I set to work getting the bottom side of the trunk lid ready for paint. Using a Scotchbrite pad, I sanded the irregular contours. With regular sand paper I was able to feather edge places where the paint had chipped away. Even here on the bottom, there were several places where rust had to be treated with acid.

It is very frustrating to find a dent after you have sprayed primer. This is where I had discovered a tiny ding in the edge of the trunk where it turns downward. I had to use a dent puller to pull it out, and this is where I welded up the hole. It will be ground down, bondo applied, and then reprimed after sanding smooth.
This is where I am as of March 17th. I am still sanding out scratches and repriming the right quarter panel, upper body panel in front of the trunk, and the area around the tail lights. It is detailed work that must be done by hand, and does not lend itself to being photographed. So I am not going to bore you with pictures where you can't even see the changes. But it is important to get the rough sanding scratches out before painting.
To go to next page, click HERE.
No comments:
Post a Comment