With
the left quarter panel installed, I thought I would tackle the right quarter
panel. But the trunk floor extension on
that side was too far gone to weld a patch to, and would have to be replaced. While the owner was trying to locate a parts
supplier that had a new one, I began working on the front sheet metal; the hood
and both fenders.
This
is a close up view of the lower front part of the right fender.
Additionally,
there was a pushed in area around a styling contour near the front. It can be seen here, just behind the headlight bezel and above the molding with the two black stripes. There were also a couple of small dents near the
lower rear portion.
The
left fender and hood had dents, but with the paint so dulled with age, they could
barely be seen, much less photographed.
I started the repair to all of the front sheet metal by stripping the paint
off with chemical paint stripper. The
stripper is expensive, but gets the paint off much faster than a grinding disc.
The
stripper is a very thick liquid that brushes on. As you can see here, I am doing this
outside. That is because it gives off
very toxic fumes that can cause dizziness, nausea, and unconsciousness.
I am wearing gloves
because if any of it comes in contact with your skin it will cause severe burning
and scarring. If you use it inside, you
have to provide plenty of ventilation, like a strong fan and a place for the
fumes to exit. Another reason for using
it outside is that it makes a mess.
Notice the metal pan beneath the fender.
Even
wearing gloves, doing it outside, with a pan underneath, it is still a nasty job. After the stripper has worked for 5-6 minutes, you scrape the paint off with a putty knife. With so much paint on this car, it took three cycles of applying stripper and scraping it off to get down to bare metal. It you try to let the stripper stay on too long, it will dry out and be very hard to scrape off.
Here is the right fender almost completely stripped down.
In
this view of the left fender, you can see all of the paint has been stripped
off. After stripping I brushed on a
liberal coat of phosphoric acid. Even if
there is no rust, the solution bites into the metal and causes paint to stick
better. Near the front of the fender is
an area discolored by the solution. This
is normal and considered a good thing.
You can also see areas that have been hit with a grinder to prep them
for body filler.
And here is the same
fender with the filler applied
After smoothing out
the filler, the entire fender gets a double coat of epoxy primer. After that, the rubber block goes over the
entire fender a couple of times with fine grit sandpaper to get the scratches
out. One final coat of primer and this
part is ready for paint.
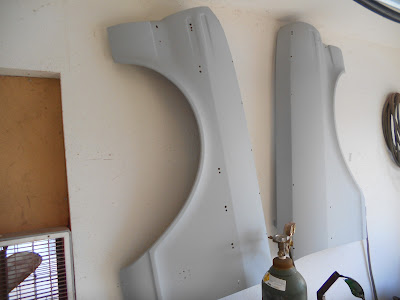
With the other fender given the same treatment, they were both ready for paint. Not wanting to ding or scratch them, I hung them on the wall for safe keeping.
In
this view below you can see the globs of body sealer that were applied between the
skin and the frame. This stuff comes out
like toothpaste, and hardens to a consistency a little harder than jello. They make it in a version that gets hard as a
rock. But you need some elasticity there
because the skin expands and contracts with heat from the sun or car engine, so
there has to be a little give in the connection with the skin.
Before I applied the sealer in the space
between the backside of the skin and the frame, I pushed folded up cardboard
into the space so the skin would be prestressed. This would give more resistance later when I
would be trying to sand the filler on the other side.
Here
is the hood as it is today. It has been
blocked out twice to remove scratches and blend the filler in so no dents show.
With the fenders hanging on the wall and the hood ready to go, I turned back to the right quarter panel. There was a lot of rusted out areas underneath the old one when it was removed. That trunk floor extension would turn out to be a real bugger.
Check back for more on the right quarter panel!


No comments:
Post a Comment